Women's History Month Activities

Your language-teaching mission, should you choose to accept it, is to celebrate women’s history month with your students using engaging resources.

Image source: www.ssf.net/Home/Components/News/News/8573/1809

March is Women’s History Month. Although it is not the only month in which we can celebrate the contributions of women, it’s a great time to remind ourselves to make sure that our curriculum is inclusive of all genders! In the United States, Women’s History Month began as Women’s History Week in March 1978.  Educators in Santa Rosa, California wanted to increase awareness of women’s contributions to society and chose a week in March because International Women’s Day falls on March 8. In 1980, President Jimmy Carter made this a week of celebration for the entire country, saying “the achievements, leadership, courage, strength, and love of the women who built America was as vital as that of the men whose names we know so well." In 1987 Congress expanded this celebration to the entire month of March.

Each month I create a booklet for the Edmonds School District to celebrate that month’s equity themes. These “diversity booklets”, which you can check out here, are designed for parents and teachers to use to supplement the existing curricular learning, or to do a fun craft or art project together while celebrating women, Arab-Americans, LGBTQ+ people, etc. Usually, I curate a selection of resources created by other educators, but this month I ended up designing quite a few of my own, and wanted to put them on the blog to share with other language teachers and provide the answer keys for those using the booklets. All of the resources below are in English, but feel free to adapt them to any language for your students!

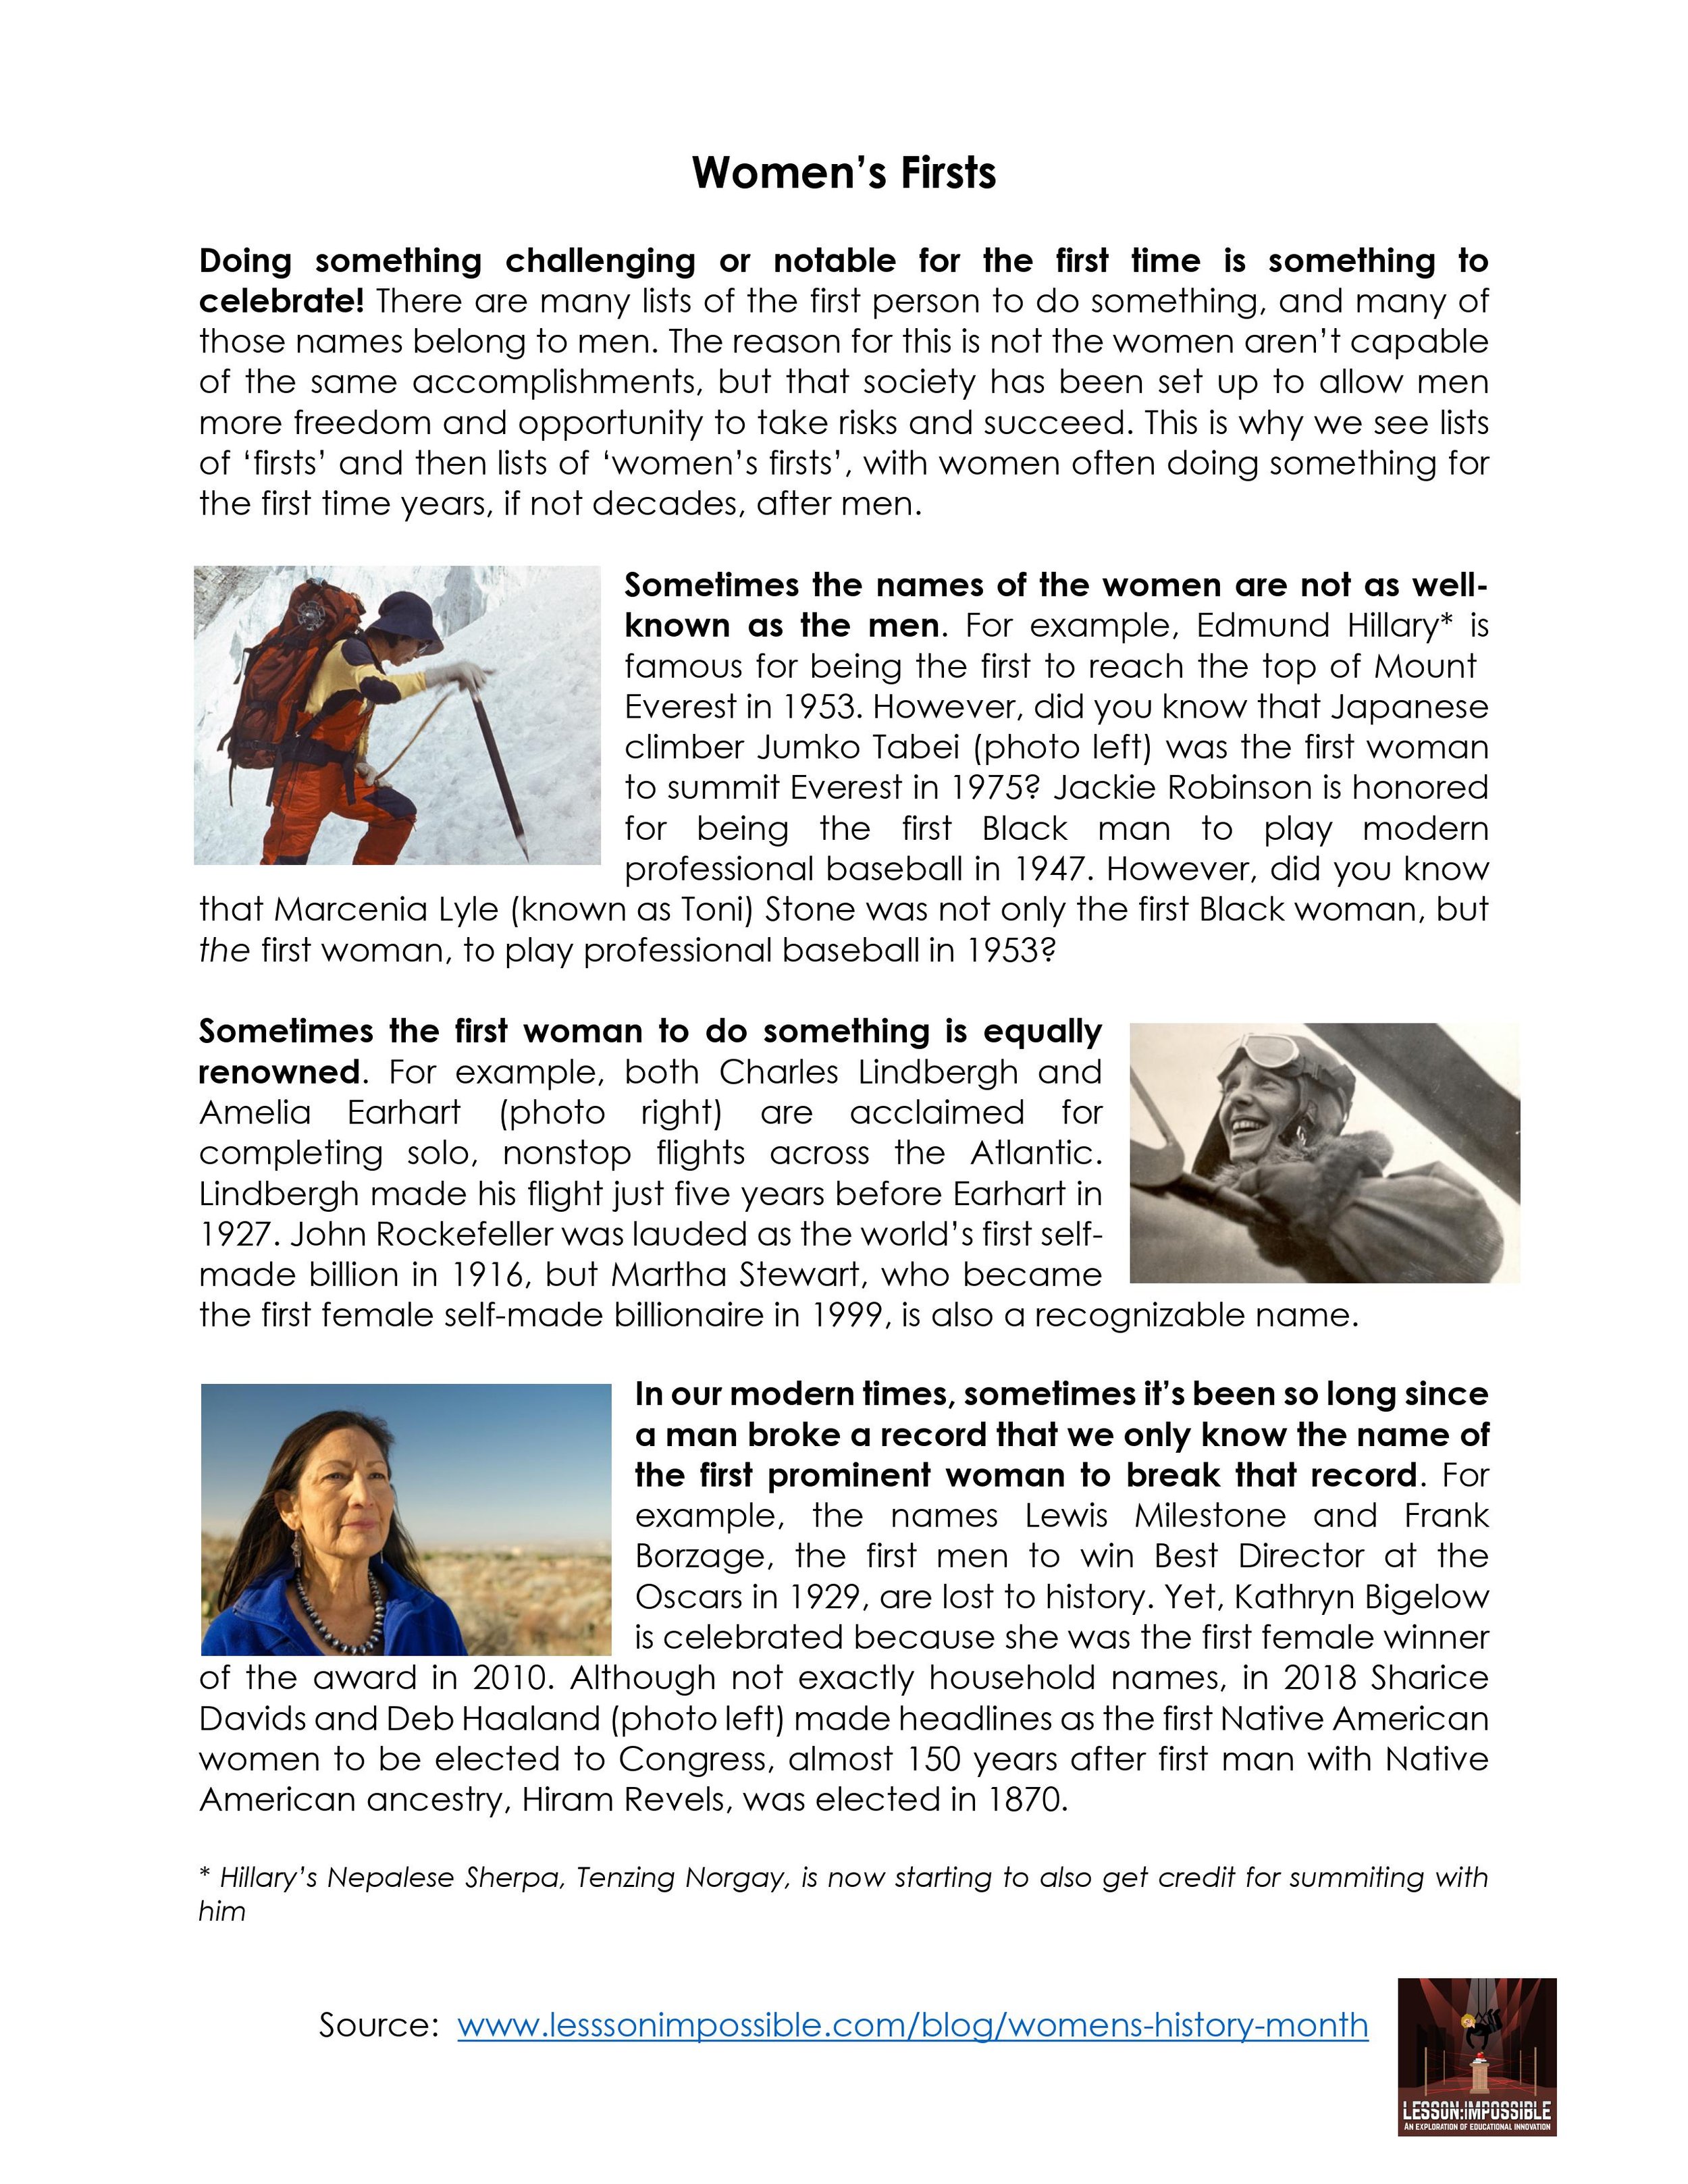
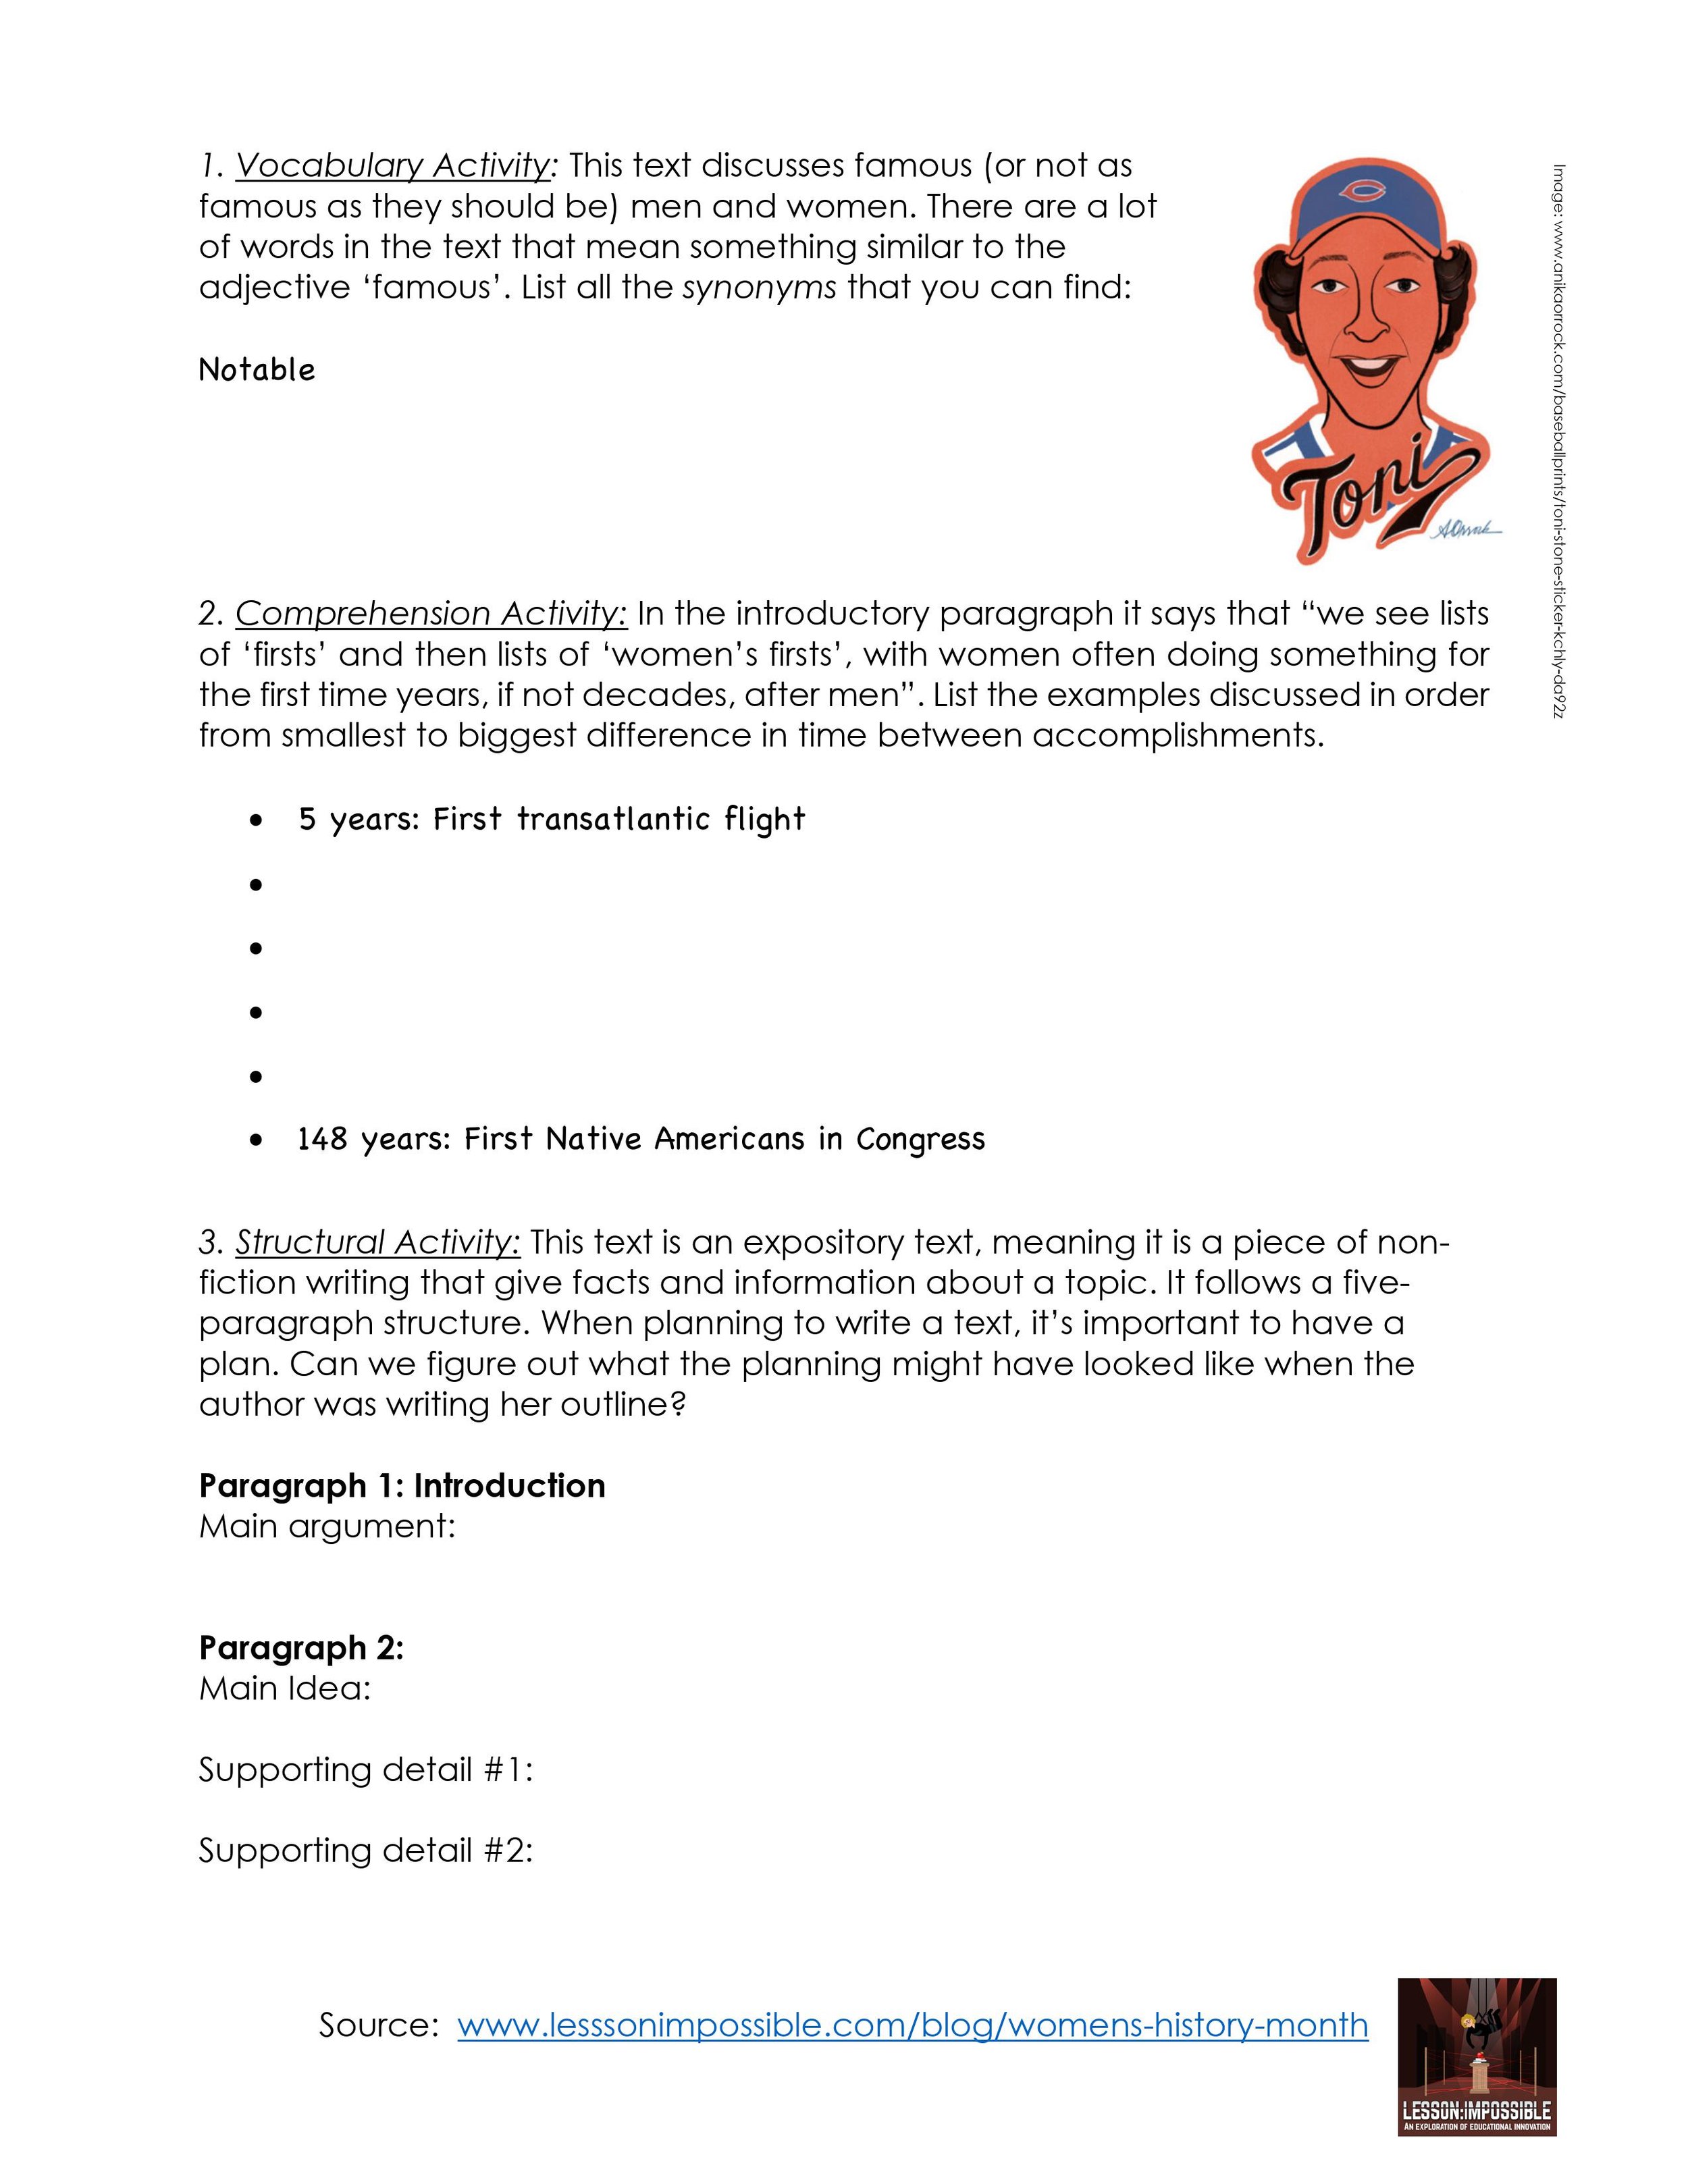
LANGUAGE ARTS/SOCIAL STUDIES: A women’s history firsts reading (written by me) with reading comprehension questions, as well as a follow-up research activity using an instagram framework. For language learners, there is a focus on synonyms, reading dates, and understanding the 5-paragraph essay frame. There is also a chance for students to speak to partners about a discussion question. If you want to extend beyond the text, you can also have students use these firsts as improv prompts.

RESOURCE: Women’s Firsts (4 pages)

RESOURCE: Women’s Firsts Answer Key

COLORING PAGE/SOCIAL STUDIES: A coloring activity that includes the real story of Sacagawea, which is not the white-washed happy narrative that has often been discussed.

RESOURCE: Sacagawea US Coin Coloring Page

MATH: US-based census data for figuring out percentages and reading an infographic.

RESOURCE: Percentages with the Census & Percentages with the Census Answer Key

RESOURCE: Reading an Infographic & Reading an Infographic Answer Key

LANGUAGE ARTS: A reading (“Who is Malala Yousafzai?”) and an activity and reading response. Designed for primary students/ELL students.

RESOURCE: Malala Reading Activity & Malala Reading Activity Answer Key

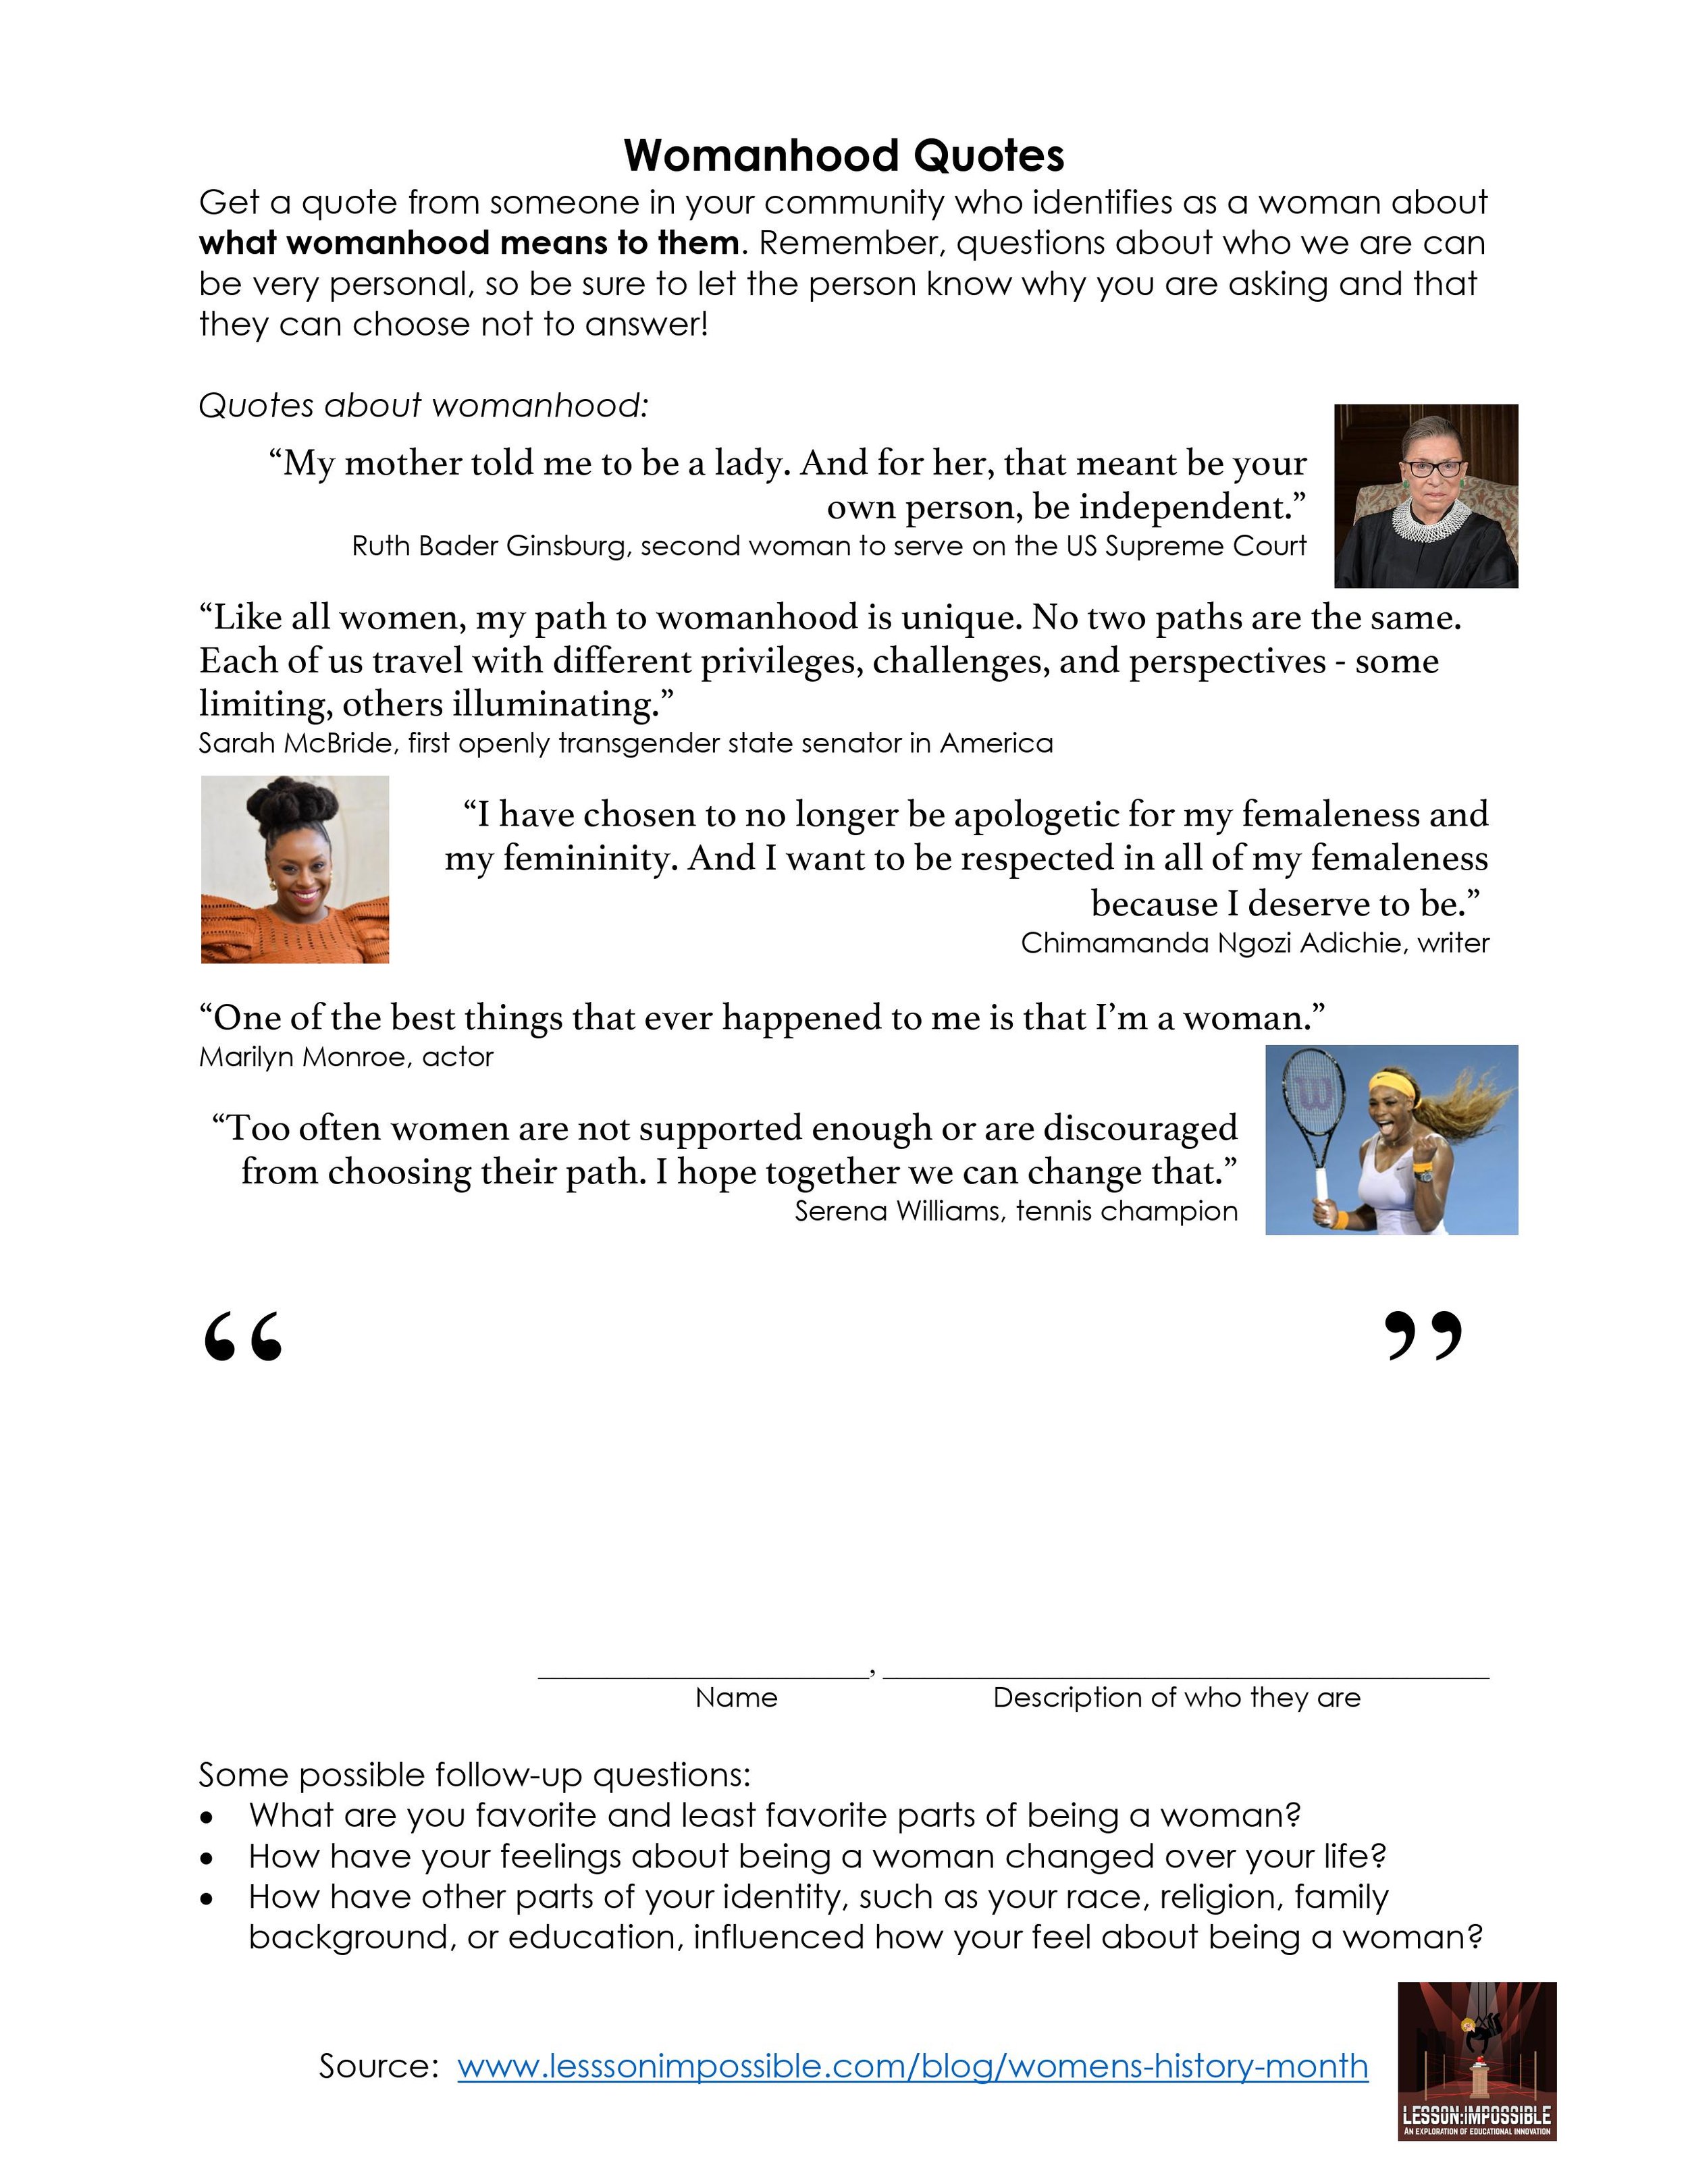
COMMUNITY CONNECTIONS: Students look at quotes about womanhood, and then find someone in their community who identifies as a woman to provide a quote as well!

RESOURCE: Womanhood Quotes Activity

READ ALOUD: For primary students, a hand-out to send home for students with links to read-alouds of picture books for Women’s History Month.

RESOURCE: Read-Aloud Handout

I’ve made an effort to be as inclusive as possible, highlighting women from a variety of backgrounds. For me, women’s history is also a great time to introduce students to the idea of intersectionality, that is, that our identities contain multiple facets. For example, women such as Mae Jemison, Aprille Ericsson-Jackson, and Katherine Johnson were important because they were both Black and female, as well as many other things, such as daughters, community members, and scientists! I love this quote from Julia Serano, who is a writer, musician and transgender activist: "So long as we refuse to accept that 'woman' is a holistic concept, one that includes all people who experience themselves as women, our concept of womanhood will remain a mere reflection of our own personal experiences and biases rather than something based in the truly diverse world that surrounds us."

How do you celebrate Women’s History Month in your classroom? These resources I’ve shared are American-centric, what are some ways you celebrate women in other countries? Share in the comments!

Alphabet Game

Your language-teaching mission, should you choose to accept it, is to expand students’ vocabulary and encourage linguistic teamwork by playing the alphabet game.

This one is a twist on a classic car-ride game! I like to use it for the first or second day of the semester as it’s a great way to “warm up” students’ brains if they haven’t been thinking about the target language for a while, and it can also be a fun creativity starter for any day of the year.

Step One: Divide students into groups. This can be done individually, but it won’t be as much fun!

Step Two: Give students a large piece of paper/chart paper with the letters of the alphabet. When a signal is given, they can start writing. They should work fast, as it’s a race to the finish!

Example of an alphabet themed by food with illustrations. Source: https://www.jenniferhines.design/food-alphabet-illustration-series

Step Three: Students write a word that starts with each letter of the alphabet in the target language. This can be general for lower levels (literally any word except for proper nouns) or more specific for more advanced learners (adjectives, words within a theme, words longer than 5 letters, etc.)

You might feel like this might be too easy for your students, but I promise you, it’s actually not. That’s for the same reason that I know I love books, and have read literally thousands of them. However, ask me to write a title of a book I’ve read for each letter of the alphabet, and my mind goes blank, as if I’ve never seen a book in my life! It’s the same with students and vocabulary, especially at the beginning of a semester.

 Step Four: Once one of the groups finishes their entire alphabet, they call “Time!” and then everyone has to put their pens down. Then the scoring begins as each group shares their words with the class. The group gets a point for a word IF NO ONE ELSE WROTE IT AS WELL. For example, say there are six groups in an ELL class, and Group A wrote “Apple”, Group B wrote “Anaconda”, Group C wrote “Advil”, Group D wrote “Adoort”, Group E wrote “Apple” and Group F left their space blank. Only Group B would get a point: Group A and E had the same word, Group C used a proper noun, Group D didn’t write an English word, and Group F didn’t provide a word in time.

Step Five: Continue going through the alphabet as a class and groups self-score as they go. This can be a great opportunity for impromptu vocabulary and grammar lessons. For example, when I do this exercise with my French students they struggle with thinking of words that begin with ‘k’ or ‘z’ that their classmates may not know. I like to share what I think is one of the cruelest words in French: ‘zozoter’, which means ‘to lisp’ but is impossible for someone with a lisp to actually say!  It’s also interesting to see what words your students bring to the table; maybe they love reading about animals and have a bunch of French animal vocabulary. I find that students enjoy the game because it’s low stakes, involves group work, and does challenge them to think beyond the basic vocabulary.

This can be a good game to have up your sleeve for substitutes, since once they’ve played it, students don’t need further instructions. As the teacher, you can also play on your own paper, and students can try and ‘beat the teacher’. I also like to keep the papers from the beginning of the year, and then play the alphabet game at the end of the year as a fun wrap-up. Then I put up their sheets from the beginning of the year, compare them to our most recent version, and we all admire how much more expansive our vocabulary has become!

Image: https://improvgames.com/alphabet-2/ (Note: I’d change “Darlene” to “Darling” in the fourth speech bubble, since the scene already established the name Betsy)

IMPROV ADAPTATION: There is a popular improv game also called the ‘Alphabet Game’ which is based on similar principles. This, in contrast to the written “Alphabet Game” above, is quite difficult because you need to stick to the context of the scene, react to the previous sentence, and have it all make sense! I’d say this is for advanced learners, but worth a try with eager (and willing to fail and start again) intermediate learners!

My favorite descriptor of the game is from Improvgames.com because eagle eyes will notice that they do the whole post in a meta-style, starting each sentence with the first letter of the alphabet. (Note: You could do a similar adaptation as a written game for students, using it for a quickwrite prompt, for example!) There is also an elimination version of this game, which allows more than two people to play the game at the same time (as demonstrated in this video by Splash Games).

UPDATE: I saw this great visual brain teaser about all the letters of the alphabet, which could make a fun starter to this starter! Answers can be found at the thinkaboutmaps Instagram page.

Have you played this before? Are there any variations that you recommend to make this easier, harder, or more interesting? Share in the comments!

Inclusive Language & Français Inclusif:

Your language-teaching mission, should you choose to accept it, is to make all students feel welcome in your class by using inclusive language.

I’ve been working hard to make my speaking and writing in English more inclusive, and finally feel like I have a handle on the singular ‘they’ and finding better ways to talk to groups of students other than “ladies and gentlemen”. However, although I’ve talked to my students about non-gendered pronouns, I’m still figuring it out myself. This post is all about French specifically, as there are so many issues to consider in a language that has adjectives and verb endings that need to match gender, not to mention the use of gendered titles for everything (writer, teacher, translator, etc.). Although the rest of this post is for my fellow French teachers (and therefore in French), I think that regardless what language you use, it’s worth reflecting on how you can best make your students feel safe and included while using that language!

This is not an uncontroversial subject. The Académie française has released a statement condemning gender neutral language. This is part of a debate within many gendered languages, and I’ve found some interesting articles (in English) to perhaps explore:

Personally, I think this is an example of languages responding to cultural needs, and am excited to see these inclusive changes!

UPDATE 12/2021: The Gender in Language Project has a guide for Spanish and Mandarin!

UPDATE 10/2022: For International Pronouns Day @SaraSavoia_ has a thread of some great pronoun resources to use in elementary school classrooms!


Le français inclusif:

Je me suis retrouvée ignorante du français inclusif. Pour changer ça, j’ai regardé un vidéo avec Hélène Frohard-Dourlent et Gabriel.le Villeneuve: « Webinaire sur le français inclusif ». J’ai appris qu’on parle de l’inclusivite, il y a une différence entre la langue inclusive et neutre. Le langage inclusif est pour parler de groupes mixtes (ex. traducteur.rice) et le langage neutre est pour parler de personnes non-binaires et propose un nouveau genre grammatical (ex. traductaire). Les deux présentataires (<– regarde ce que j’ai fait là ?!?!) discutent l’un et l’autre.

Il y a beaucoup de façons que le français serait inclusif pour les femmes, comme créer des termes féminins (ex. écrivaine ou inspectrice), donner le féminin l’emporte (ex. « La plage et l’océan sont belles »), faire l’accord basé sur la proximité (ex. « L’océan et la plage sont belle ») ou inclure un double flexion totale (ex. les collaborateurs et les collaboratrices (ou « collaborateur.rice.s »). Ces stratégies pour la féminisation sont plus bien connues, mais les stratégies pour la neutralisation étaient nouvelles pour moi. Pour exemple, il faut utiliser le syntaxe et vocabulaires épicènes (c.à.d. androgynes), comme « collègue », « scientifique », ou « une personne étonnante ». Aussi, il suffit qu’on utilise les néologismes neutres. On le fait ça avec les pronoms (ex. iel, ol, celleux, elleux), un article neutre (ex. an, san, man), des mots-valise ou modifications (ex. toustes, froeur / adelphe [de grec], Mondame, Minêtre, heureuxes) ou une omission (ex. an traduct*).

Je pense que j’aurai besoin de pratique pour faire mon langage plus inclusif. Les choses que je peux immédiatement changer sont : utiliser une double-flexion partielle (ex. mes ami.e.s), respecter si quelqu’un utilise le pronom « iel »,  et dire « une personne » + un adjectif pour éviter d’identifier un genre. Plus, j’aime beaucoup « toustes » pour s’adresser à un grand groupe ! J’ai appris aussi un nouveau verbe pour quand on utilise un pronom ou accord grammatical qui ne correspond pas au langage que la personne utilise : « mégenrer ».

ALORS j’ai tellement aimé cette vidéo que j’ai fait un aide-mémoire à envoyer à mes étudiant.e.s et collègues pour qu’ils l’utilisent ! J’en ai mis une copie ici aussi : Strategies pour une langue neutre et inclusive.pdf

Des ressources supplementaries:

Des ressources supplémentaires:

NOTE: As of November 4, 2022, I’ve started a separate blog post collecting resources, which I will continually add to. You can find it at https://www.lessonimpossible.com/blog/ressources-francais-inclusif

Une liste de termes épicènes ou neutres : https://bdl.oqlf.gouv.qc.ca/bdl/gabarit_bdl.asp?id=5465

Plutôt que de choisir entre deux mots (ex. un représentant et une représentante) on peut essayer de trouver un autre mot (ex. une porte-parole) 

Guide de grammaire neutre et inclusive : https://divergenres.org/wp-content/uploads/2021/04/guide-grammaireinclusive-final.pdf

Un guide pour comprendre et utiliser la grammaire inclusive par Diver Genres

Guide pour la rédaction inclusive à l’Université Laval : https://divergenres.org/wp-content/uploads/2021/03/guide-redaction-inclusive-2020-femul-2.pdf

Un guide qui discute les définitions, l’historique, la démystification, les règles, les formes d’écriture inclusives et des exemples. 

Guide pour désigner les personnes non binaires: https://www.noslangues-ourlanguages.gc.ca/fr/cles-de-la-redaction/ecriture-inclusive-lignes-directrices-ressources#lignes-directrices

Un guide écrit par l’Office québécois de la langue française.

Un article academique: https://www.florenceashley.com/uploads/1/2/4/4/124439164/ashley_les_personnes_non-binaires_en_fran%C3%A7ais_-_une_perspective_concern%C3%A9e_et_militante.pdf

“Les personnes non-binaires en français : une perspective concernée et militante” par Florence Ashley de McGill University

Les formidables ressources de Kris Knisely: https://www.krisknisely.com/resources-for-educators

Les info-graphiques comme “Oral Communication Strategies used by non-binary speakers of French” et “Language forms used by non-binary speakers of French”.

 Un post sur le blog “En Tous Genres”: https://entousgenresblog.wordpress.com/2017/04/19/quels-pronoms-neutres-en-francais-et-comment-les-utiliser/

Un post sur “Le langage neutre en français : pronoms et accords à l’écrit et à l’oral”

Écriture inclusive en correspondance : https://www.noslangues-ourlanguages.gc.ca/en/cles-de-la-redaction/ecriture-inclusive-correspondance

Une guide pour la correspondance par le Bureau de la traduction du Governement du Canada

Sam Utilise Iel: https://www.lessonimpossible.com/blog/inclusive-pronouns-en-franais-sam-utilise-iel

Une petite histoire illustrée pour les élèves pour expliquer comment on peut utiliser le français inclusif avec un.e. ami.e non-binaire

Lexique de Genre Neutre: https://www.alpheratz.fr/linguistique/genre-neutre/

Extrait du livre d’Alpheratz “Grammaire du Français Inclusif” (2018). Merci à @YaruSol de m’avoir présenté ce site.

Guide & Zine d’élève: https://juliaspiegelman.wordpress.com/resources/

Un google doc (A Student’s Guide to Queer and Non-Binary French) et un zine crée par un.e élève non-binare (“IEL: A Zine on Gender-Affirming Language for the French Classroom (by a trans* French student”)). Tous en anglais.

Le Devoir Article: https://www.ledevoir.com/lire/649374/litterature-un-iel-vieux-comme-les-cultures-autochtones

“Un «iel» vieux comme les cultures autochtones”

Open Educational Resource Conversation Tool: https://pdxscholar.library.pdx.edu/pdxopen/40/

CITOYEN.NE.S is a French language method for the conversation class at the intermediate/ advanced level. Content and activities are built around the concepts of diversity, inclusivity and equity, and engage students to practice French while questioning and participating in the world they live in – to be full citizens whatever their background, their race or their gender identity.

How to Use Proper Pronouns: https://properpronouns.com/

Un guide pour l’utilisation des “proper pronouns” (une mention d’une personne en particulier dans la troisième personne). En anglais.

Warm-Up: Find 5 Things

Your language-teaching mission, should you choose to accept it, is to start class with a fun, visual warm-up game that enhances students’ vocabulary knowledge.

The “5 things” game is one that was modeled for me at a professional development session, and I used it the very next day in my classroom! My students like it, it’s easy to explain, there are literally infinite variations on it, and it somehow manages to be both competitive AND team building!

STEP ONE: Students are put into pairs (or threes if needed). They do not need to be sitting close to their ‘partner’, in fact, it’s better if they are not!

STEP TWO: The teacher puts up an image. Literally any image, as long as there are at least five things (hence the name) that can be identified.

STEP THREE: Ultimately, the goal of the game is to gain points by having the same five words as your partner to describe the picture (one point per answer, maximum five points per round). Once the image is revealed, I’ll give students a few minutes to write down their answers silently and secretly. So, for example, if I show this picture, a student might write down:

Image still from: The Princess and the Frog (Disney)

  1. Princess

  2. Frog

  3. Night

  4. Kiss

  5. Tiara

This can be made harder or easier, more focused on grammar or less. For example, the first image I used was pretty simplistic. I’m not saying you should use Where’s Waldo, but an image of a Haitian market, for example, might make the game more difficult! If the parameters I give are just to have the same words, I always have the rule that all nouns, adjectives, verbs, and adverbs are all allowed EXCEPT for colors! Unless it’s a beginner-level class, having to rely on colors seems a bit like cheating to me. However, you can definitely make this more complex by putting stricter parameters around the image. For example, I may say that students need to find two nouns, two verbs, and one adjective.  Therefore, the imaginary student’s list might look like this:

1.     NOUN: a frog

2.     NOUN: a princess

3.     VERB: to kiss

4.     VERB: to blush

5.     ADJECTIVE: romantic

If you’re working on a particular grammatical construction, then you can put up an image and say “find five of the same verbs in the imperfect form”. Or if there is an image that involves a lot of unit vocabulary you can say “find five of the same words (doesn’t matter what part of speech), but spelling counts!”

STEP FOUR: Partners tally up the points (the silent and secret part is now over). Using the above first example, if Student A wrote princess, night, frog, kiss, tiara and Student B wrote princess, frog, kiss, gloves, dress then they would have 3 out of 5 possible points because they chose three of the same words. It’s then the honor system for students to share out how many points they have. Sometimes I’ll do multiple images and we’ll have a ‘winner’ for that day’s total. Other times, I’ll do an image a day for a week and we’ll have the ‘winner’ for that week’s total.

STEP FIVE: Share out some the answers! It’s a great way to build vocabulary for the rest of the class, and some of the answers can be really fun or surprising. My favorite question to ask is “what is a word that your partner had that you didn’t?” because those are usually the more unique words and students are more likely to share their partner’s answer in order to showcase their partner’s brilliance than they are their own (though that’s high school students, elementary students might be more open to sharing their own thoughts!)

STEP SIX: Continue using it as an intermittent warm-up for class and change it up however you see fit. I like using themed images (example, fairy tales for my fairy tale unit) but as long as the image is appropriate, why not use it! Like I mentioned above, I’ll put different parameters around the words they need to find and sometimes I give the ultimate difficult instruction: find five words that your partner DOES NOT have! Students only get points if their words are totally unique… so they really need to dig deep into their vocabulary knowledge stores. The other thing you can then do is use the same picture, now that they have a bunch of vocabulary at the ready, for a quickwrite.

 Some examples of dynamic pictures to use as prompts:

Have you ever played this game or a variation on it? Are there any constrictions or images you prefer using? Share in the comments!

Halloween Activities in the Language Classroom

Your language-teaching mission, should you choose to accept it, is to provide fun activities so that your students can celebrate Halloween and/or enjoy spooky characters and legends.

The Social Studies department was the Flinstone Family and I was Baby Pebbles!

The Social Studies department was the Flinstone Family and I was Baby Pebbles!

I LOVE Halloween sooooo verrrry much. I know that there are a lot of reasons not to celebrate it in schools, though the schools I’ve taught in have gone whole hog into Halloween, with costume contests (for students and teachers!) and a big dance thrown by the Student Council. In my classes I’ve always made the activities optional, though I realize in hindsight I could’ve been more in tune with how the ‘opt-out’ formula doesn’t work when kids are afraid of being different than their peers. When I return to the classroom, I think I’ll have different stations set up with equally-as-fun options. Also, probably a lot more discussions about cultural appropriation and stereotyping when it comes to costumes!

In a language class, depending on the target-language and the cultures that speak it, Halloween can also be a rich topic of discussion about how traditions change over time (see resources for advanced learners below), as well as attitudes towards the dead. Even if Halloween isn’t your thing, there is some fun in telling spoooooky stories at any time during the dark winter months.

In the interest of my target language, did you know that there is a France connection to the origin of Halloween? France and Belgium have traditionally celebrated All Saints Day, but have adopted more and more of the North American Halloween. There are many Halloween traditions in Quebec, much like the rest of Canada. Haiti has La fête des Guédé, a voodoo Day of the Dead, though I’ve read that many Haitian Christians participate as well.


Halloween Activities for Beginners:

Truly one of the best pumpkins I’ve ever carved… Jacques O’Lantern!

Truly one of the best pumpkins I’ve ever carved… Jacques O’Lantern!

 For beginners, vocabulary is really the name of the game. Usually I start off with a ‘vocabulary scramble’ where I post pictures around the room with numbers on them. Students then walk around the room and write the number (and translation if they need it) on the lines. It gets everyone up and walking around, and if I have a particularly competitive class I’ll make it a race to the finish with a prize.

RESOURCE: Halloween vocabulary scramble

Vocabulary can then be reinforced with a vocabulary sudoku. This can be adapted to any language: just “search, find, replace” the vocabulary words so that “la lune” becomes whatever a moon is in your target language and then the whole thing works!

RESOURCE: Halloween Sudoku

I then add grammar practice to the newly gained vocabulary through a Halloween graphic. Again, this can be adapted to any new language if that language uses comparisons, superlatives, and/or prepositions. It’s just a Halloween-based image that has students making relationships between things (the bat is smaller than the witch; the bat is to the right of the witch). There’s a blank space in the middle for students to draw whatever vocab they want to add to the picture.  

I found this example in a book, took a picture, and wish I could attribute it to the original author. Does anyone recognize this? I think it was by the same publisher that does “Les 10”

I found this example in a book, took a picture, and wish I could attribute it to the original author. Does anyone recognize this? I think it was by the same publisher that does “Les 10”

RESOURCE: Halloween Prepositions & Halloween Prepositions Key

RESOURCE: Halloween Comparisons and Superlatives (this one I ended up hand drawing horns on the bald guy to be ‘the devil’)

I’ve always wanted to do this activity, but never got around to it, but having students create “wanted posters” for spooky characters would be, I think, a lot of fun. It’s especially helpful to reinforce descriptive vocabulary.

RESOURCE: Strange Creatures Wanted Poster

This is only for the ELL teachers out there, though the discussion question part could be modified for any language, and perhaps even the listening part if you were very keen, but I really enjoy discussions with students about UFOs! I feel like I learn a lot about them from how they would react to strange beings appearing on Earth. And if you really want to further the lesson, there’s a lot of interesting discussions to be had around modern immigration attitudes.

RESOURCE: ELL Aliens Activity

This is only for the French teachers out there, but I couldn’t let this list be without mentioning that the classic “C’est l’Halloween” by Matt Maxwell is on YouTube. It’s great for beginners as it has simple vocabulary, clear voice, and a chance to practice counting 1-18!

RESOURCE: C’est l’Halloween PPT (made by eTools for Teachers) & C’est l’Halloween lyrics 


Halloween Activities for more advanced learners:

Campfire stories with an iPad fire

Campfire stories with an iPad fire

Speaking: CAMPFIRE STORIES! Obviously, you can’t light a fire in a school, but my solution to that has been to borrow an iPad cart, put all the iPads to a campfire video, and we sit around them and tell stories! I’ve done this with legends and ghost stories I’ve given to students to read as a group, and then adapt into a quick skit to share the legends with the rest of the class. You could also do vocabulary improv prompts and have students present. Or a one-word-story… see how long you can keep the story going around the campfire!

Reading/Speaking: The history of Halloween is very interesting. As mentioned above, there’s also some interesting debate topics for students to hash out: should Halloween be banned from schools? What costumes are and are not appropriate to wear? What’s scarier: killer clowns or giant spiders?

RESOURCE: French history of Halloween

Listening comprehension: watch a video in the target language about the history of Halloween or particularly spooky stories in the target-language

Specifically for French teachers, did you know that TV5Monde has an amazing collection of Quebecois, Acadian and Indigenous legends? For a spooky vibe, you can use two of their ghosty legends: La Dame Blanch or Le beau fantôme du capitaine Craig.

RESOURCE: TV5Monde’s teacher’s guide or the worksheet I’ve adapted from those resources (Dame Blanche)

RESOURCE: TV5Monde’s teacher’s guide or the worksheet I’ve adapted from those resources (Capitaine Craig)

Writing: This is more spooky than directly related to Halloween, but I personally am a big fan of urban legends such as Big Foot, little green men, Loch Ness monster, weird crop circles, haunted dolls, etc. One assignment I’ve done with more advanced students is have them read newspaper and blog articles and then analyse them for style. Their assignment is then to write an article (EXAMPLE: Big Foot Article written by a student).

RESOURCE: Information sheet about the structure of an article in French (not my resource, created by Marie-France Rachédi)

RESOURCE: Urban Legends article assignment explanation and rubric (I will caution and say that this is an ooooollllldddddd assessment, so I do not assess exactly like this anymore, but it might be a helpful starting point if you want one)

RESOURCE: A list of blog sites (again, this is old, so they might not all exist anymore) of various urban legend phenomenon

Let me know in the comments what resources you like using around this time of year! Do you avoid Halloween, embrace it, or put your twist on it? Feel free to share!

Quickwrites!

Your language-teaching mission, should you choose to accept it, is to encourage students’ creativity and writing skills, as well as lessening their anxiety about making mistakes, by using quickwrites.

writing-2-1312013.jpg

Have you ever given students ten minutes to write, only to realize that they’ve only written three lines? It’s not that they’re being uncompliant, they just “don’t have any ideas”, or, for many students with negative language-learning experiences, they are scared to write anything if it’s not perfect. This is where getting into the habit of doing a “quickwrite” is useful!

I love starting a class with a quickwrite, especially if we’re not starting with a sharing circle. It eases us into the day, and gets us in that French mindset. It’s also a great reminder for students, because I repeat it again and again, that it’s about communication and not about being exact! If students don’t know a word, they don’t stop and look it up, they just put it in English between brackets or virgules, and look it up or ask after the quickwrite is done. The whole idea is fluidity of thought, not worrying about mistakes, and realizing how much you actually know when you’re pushed for time!

If we’re going to be talking about specific content, it’s also a great way to get the students thinking about ideas. For example, I do a technology unit, and there are A LOT of great discussion questions: where measure of privacy should we expect? how should we treat robots when AI inevitably become sentient? Is the use of parental controls fair? And on and on.  For the students who don’t like spontaneous discussions, and need time to ruminate before speaking, putting it all down in a quickwrite is a way to put them at ease.

So what are some good quickwrite prompts?

  • An ethical conundrum or serious question (see above)

  • Put up an interesting photo or meme, ask students to describe it (adjectives!) or create a story around it (tenses!)

  • Watch the first three minutes of a short film, have students finish the story. Then, when it’s over, watch the rest of the film and compare in small groups how their own stories were similar or different. Most of the time, students’ stories are equally as good or better!

  • Do a quickdraw first where students draw a picture. Then, after exchanging the drawings with a partner, describe or narrate the other person’s drawing

    • It’s not technically a quickwrite, but something similar that I love doing is the Telephone Pictionary It’s always fun, quick, and makes for a great opening to class filled with laughter.

    • Also similar are other ways of generating visual ideas for students to inspire each other (and have some kinetic fun!). For example, students can make shapes or mini-scenes with pipe-cleaners (thanks Vanessa Drew for this idea!), found objects in the class, or even with play-doh. You’d be surprised how much senior students get into this, having not had the opportunity to play around like this since elementary school!

  • Pull three to five unit vocab words from a hat that students need to use in a story

  • Literally anything that gets them writing!

  • NOTE: A lot of prompts that work well for improv scenes work equally well for quickwrites! Check out a list of creative prompts here.

What do we do with them when the ten (or however many minutes you choose) are up?

  • A question prompt can be a lead-in to a discussion, and it lets students know where the gaps in their vocabulary are so they can look up words before they start talking

  • Students can be given time to edit and then reflect on areas they need improvement on

  • If you gave students explicit instructions of what to include (for example, they need to use as many transition words as possible and they are allowed to use a list of transition words if they need it) you can have a competition where they count them and you see who had the most of whatever it was. RESOURCE: French Transition Words

  • Exchange with another student for them just to read or for them to edit or give feedback

  • SUMMATIVE FEEDBACK FOR/FROM ME

    • Often, I’ll have students focus on one thing only and I’ll give them feedback only on that one thing. This is good for me, because I don’t need to do a lot of marking, just looking at one aspect of students’ writing. They are less nervous because I don’t care about anything else they’re writing (this can be hard because when I see an error that is unrelated to the one thing I said I would look for I just really, really, really want to correct it. However, I refrain, because I want students to trust me and not feel constantly judged). I will ask students to highlight or underline that one thing, for example adjectives, and then I can also see that they know what they are supposed to be doing (if they also highlight adverbs, then we need to revisit definitions!) and then give feedback just on those things. IF I have time, I’ll also respond to their writing itself, like commenting on the story, but this is just a ‘quickmark’ for me!

    • If there is a concept that students are struggling with, having TWO highlighter colors can be a great communication between you and the student. For example, they highlight or underline in yellow all the adjective uses that they are confident in, but highlight or underline in green all the adjective uses they think might be wrong. That way you see where the common issues are, but also where students think their issues are! This also gives them permission to make mistakes even on the things you’re looking for. If they’ve been scared to use the adjective “vieux” because they’re unsure where it goes or how it changes, now’s the time to go for it! (This is a true story for me… I still prefer “agé” so I can think less about it!)

    • For this purpose, I have students do their quickwrites in a journal that they use just for my class. A lined student notebook will get half-filled over a semester with quickwrites and other activities. Some students keep the journal over a few years of French and it’s really cool to see that long term progression! Once I’ve looked at the quickwrite I will put a sticker or a stamp (I have a large collection of stamps). This way if there’s no corrections to be made, but I don’t have time to personally respond with a sentence, students still know that I’ve looked at it!

  • I even will use quickwrites prior to the writing sections on tests where there is a long writing component. Students get draft paper to get all their ideas out first, then they write on the official test paper. In these assessments I use a rubric that we’ve used to self-assess our previous quickwrites so that it’s not unfamiliar. RESOURCE: Legends Quickwrite Quiz (In this example, students choose one writing prompt to respond to. They are all types of prompts that we have practiced in class).

Screen Shot 2021-09-25 at 7.19.59 PM.png

How do you use quickwrites in your classes? How long do you usually give students? Feel free to comment!

PART II: GENIUS HOUR 3-steps to success!

Your language-teaching mission, should you choose to accept it, is to engage students in their L2 throughout the year by doing genius hour projects.

This is Part II of my two-part entry on using Genius Hour Projects! Part I can be found here, which explains why I love these projects so much!

Note: I exclusively did these projects with my senior students as a way to showcase their five years of language learning. This was because French 12 was an elective, so students had chosen to be there, students were capable of doing self-directed work, and their language ability was such that this was possible. However, I do think there’s a way to adapt this for lower-level language classes, if you’re willing to try.

Step One: Introduce the project to students

This was done in the first couple of weeks of class. I had a powerpoint where I would start with a turn-and-talk about the idea of ‘genius’ and how it’s all in the eye of the beholder, and include one of the most well-known teacher cartoons of all time:

Tout le monde est un génie. Mais si vous jugez un poisson sur sa capacité à grimper à un arbre, il passera sa vie à croire qu’il est stupide – A. Einstein

Tout le monde est un génie. Mais si vous jugez un poisson sur sa capacité à grimper à un arbre, il passera sa vie à croire qu’il est stupide – A. Einstein

We would then watch a video explaining genius hour, and some other YouTube inspirational stuff. Sometimes I would do some creativity exercises (I’ll post some soon). Then, I would explain the project and have students start to brainstorm what they’d like to do. I’d explain to students that this was in lieu of a final exam, and a chance to showcase everything they’d learned in French.

Students would submit an ‘application’ for approval of what their project would be. Once approved, they would write their inquiry question on a piece of paper which we affixed to a bulletin board on one of my walls. Since I had multiple classes, it was cool for them to see what other people were working on! I could also put up any updates or messages about the genius hour projects on that board.

RESOURCE: Project hand-out/application: Genius Hour Proposal

Step Two: Work on it throughout the semester/year

This was the hard part, as I always felt like I had too much curriculum to cover, and not enough time. However, the more time I gave for students to work on the project in class, the better their projects would be. Moreover, the more time I had to check-in with students and see how they were doing, guide their project, and do small, informal conferences, the easier it was for me to mark the projects! Giving students a heads-up was invaluable, as many of them had a lot of material they wanted to bring in to work with (I loved seeing students, for example, pull out a block of wood and start carving!)

There was a lot of ways to incorporate current lessons, such as starting the class with a chance for students to chat about their project’s progression using, for example, four adjectives or in the past tense. Mostly, though, I just enjoyed seeing them do their thing!

Some students used blogs, which was a great way to keep an eye on what they were doing if I didn’t have time to check-in during class

Some students used blogs, which was a great way to keep an eye on what they were doing if I didn’t have time to check-in during class

This was also FANTASTIC if I knew I was going to be away for a meeting. I’d tell students that they’d be working on their genius hour projects on X day, and then my substitute plan was just an explanation of the project and directions to supervise so I didn’t need to worry if my replacement spoke French or not.

I would also do goal-setting and check-in dates to keep students on track.

RESOURCE: goal-setting form: Genius Hour Goal Setting

RESOURCE: check-in form (mid-way through project): Genius Hour Check-In

Step Three: Presentation time!

At the end of the semester I was lucky in that we ended up doing these HUGE half-day classes (2.5 hours) in the last week so everyone could present. Before that, I would do 3 rounds of 20 minutes in an 80-minute class. So students would be at “stations” (usually 5-6 at a time) and the other students would wander around to check it out and ask questions (see below). Then, they would ‘switch’ and new stations would be set up, so the focus was only on 5-6 students at a time, usually talking to 3-4 students at a time.

RESOURCE: Questions prompts for students to use in a variety of tenses: L’heure de génie questions

A few times I invited other classes to come check out the projects. This was great if I could get grade 11 students since a) it was good advertisement for taking French 12, an elective, which meant I got to keep my job and b) it allowed the students to present to an audience that hadn’t seen the progression of their project. I also invited the administration (as a new teacher, great to showcase cool things you’re doing) who were allowed to ask questions in English or French. My favorite, of course, was when students would bring their pets or bake yummy things to share!

Student presenting to peers; me spying and taking pictures

Student presenting to peers; me spying and taking pictures

During this time I would go around eaves-dropping and interacting with students so that I could give them a speaking mark based on their fluidity and vocabulary use. I found that I had enough time to get a good sense of students’ abilities during the time we had, though another option would have been a 1-on-1 scheduled appointment for an oral interview. I run a pretty interactive class to begin with, so I had also heard students speak daily for the entire semester.

Then, I would do a mad scramble for evaluating the written part before submitting my marks. I also had students do self-evaluations. Depending on the students I would have certain criteria (demonstrate certain tenses, use vocabulary from our musique mercredi weekly assignments, etc.) Because I wanted in-depth feedback, students had the option of doing their self evaluation in English or in French.

RESOURCE: Genius hour evaluation: Genius Hour Rubric

RESOURCE: Genius hour self-evaluation: Genius Hour Self-Eval

PART I: GENIUS HOUR Why I love genius hour projects

Your language-teaching mission, should you choose to accept it, is to engage students in their L2 throughout the year by doing genius hour projects.

This is Part I of my two-part entry on using Genius Hour Projects! Part II can be found here, which explains my three-step process for doing these projects, along with all my rubrics and hand-outs.

What’s a genius hour project you ask? Well, this video does a pretty great job explaining it. Basically, it’s a project that lasts the entirety of a school year/semester and is (somewhat) self-directed. Students choose an inquiry question (and some teachers are stricter on the definition of an “inquiry question” than others) and spend the time allotted to answering the question. It’s ‘supposed’ to take 20% of class time, but I’d say what I did was more of a 10%.

I have students brain storm some things they would do if they had the time

I have students brain storm some things they would do if they had the time

Since my goal is language use, I’m pretty open to ANYTHING students want to do. The way I present it is: what is something you would want to spend your time on if you were given extra time in your day? So, I’ve had students teach themselves coding, learn ASL, design jewelry, make a comic book, and research the best type of pet habitat for a hamster and build one for their new pet!

Student planning her dorm for college

Student planning her dorm for college

There’s always a research component to the project (or a science-fair aspect). So, one example of a project was a student wanted her family to eat together more often. Her goal was to cook a meal for the family to share once a month. First, she surveyed them on their likes and dislikes. Then, after each meal she elicited feedback (quality of the meal, improvement for next time). She also had “personal testimonials” from her parents and brother about the experience of doing these family meals together, took pictures, put them on a poster board, and then presented about her experience. Another student wanted to have the best dorm for when she went to college the next year. So she found pictures of the dorm she was going to, created all these vision boards of design features, got a budget, priced out what she was planning on buying, and presented on what her dorm would look like. Another student loved magic-realism books so she wrote a magic-realism short story! First, she researched what features made the genre, read books she liked (for me, I didn’t care what language she read it) and then wrote a story! I gave her an option: write the story itself in French OR write the story in English but reflect on the story-making process in French. Because she was a super-star, she did both!

Bakes sales for the children’s hospital

Bakes sales for the children’s hospital

Some projects, because of their free-form nature, can be incredibly personal. One student wrote in a gratitude journal every day (in French) which she later shared. Another student wanted to start a school club for female gamers because she felt excluded from the current (all-male) school club. Her project was about reflecting on that journey (in French) though the club was an English-language club.  Another student was currently in a (at that point, year-long) fight with our school board about an anti-bullying policy for LGBTQ+ students (he wanted one), and I gave him the option of reflecting on that process as his genius hour project. A group of two students (I eventually opened up the project for pairs to do bigger things together) used their two original ideas (becoming better at baking, volunteering at the children’s hospital) to fundraise for the hospital through bake sales.

Some projects don’t go so well. Students who imagined writing, producing and filming a short film end up just submitting a script that was never filmed. I’ve seen a half-finished tesla-coil and five-seconds of a stop-motion animation film that was supposed to be a minute (it made me think of this clip from Parks and Rec!). I’m very much a “it’s about the journey, not the destination” person, so I truly don’t care that your tesla coil failed, just that you wrote about the experience and are willing to talk about it with me and your peers in the target language.

Some more examples:

"Picture Stories": Using YouTube Videos for grammar practice

Your language-teaching mission, should you choose to accept it, is to use YouTube videos to engage students in grammar practice.

A quick and easy way to use a YouTube video is to show and respond to it (no prep needed). However, if you're willing to put a little time in before hand, you can jazz it up for some fun times. All you need is a word document and the ability to take a screen shot (on Mac it's command+control+shift+4).

Step Zero (before students): find a YouTube video (either in the target language or one that is mostly silent, like Mr. Bean). For this case, we're using Le Grenouille Qui Était Un Prince. Take screen grabs of some interesting looking scenes. Make a word document, like this one: Le Grenouille Qui Était Un Prince Picture Story

Step One (with students): students make up sentences (using the grammar structure you want to practice) based on the pictures that they see (DO NOT show the video yet).

You can project the screen captures using a projector if you can only print in black-and-white (as I could only do). That way students can see detail. Encourage students to really stretch their imaginations, don't rely on stories they already know. For example, the first screen grab is of the king giving his daughter a golden ball, which she will lose, and a magic frog will save for her. Looking at the photo where father and daughter are hugging, we instead decide the sentence will be "La princesse (qui est un zombie) vole un bal d’or en mangeant le cerveau du roi." (The princess, who is a zombie, stole a golden ball while eating the king's brains). So, some imagination + using the present participle.

This is a great activity to do in pairs, or groups. Also super funny to share out, since they'll be unique (unlike the 'real answers'). You can even have students do a jigsaw activity, going around the room writing down their responses to each photo, and then go celebrate/correct their sentences before the second part of the activity.  I like this because they get immediate feedback on the grammar structure before reinforcing it further in step two.

Step Two: Watch the video. Stop after each scene that the picture represents and have students write a sentence that describes what 'actually' happened. For example, "La princesse dit « merci » en embrassant son père." (The princess said thank you while hugging her father <--- told you it was less exciting than zombies!). This can be done as an extension/homework if students have access to computers to watch the YouTube video.

The sky is the limit, and once you've go the template, it's easy to replicate. I've done this with all sorts of stories, including, as mentioned above, Mr. Bean videos! (RESOURCE: Mr. Bean Picture Story with Si-Clauses) When I'm in a real rush, sometimes I'll reuse the stories for other grades/units, just swap in a new grammar concept. While ideally the video is relevant to the unit we're doing, sometimes you need to plan something for a substitute teacher at 1am, and this is an easy thing to create!